How To Enable Hardware Acceleration In VLC And Save Battery | Windows, Linux, OS X
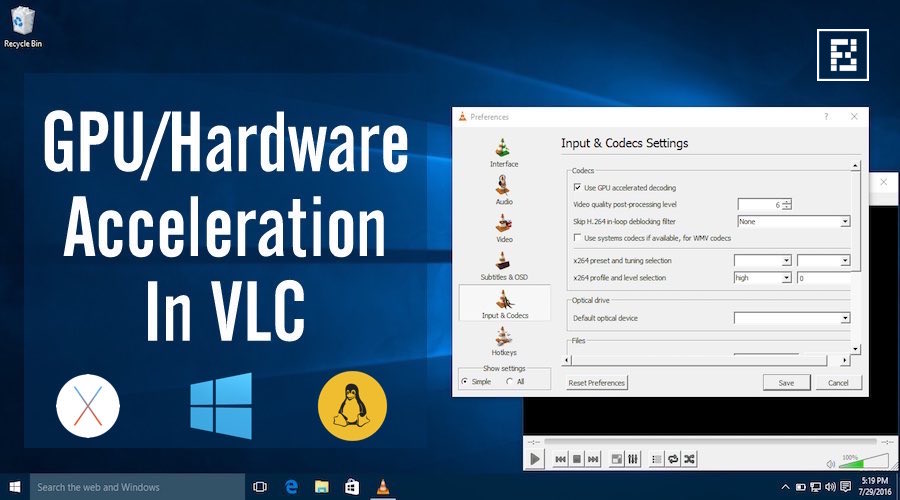 Short Bytes: Few people know about the hardware acceleration option provided in their VLC media player. It allows your laptop to play videos smoothly and extend its battery life. To enable hardware acceleration in VLC, you just need to look for options like GPU acceleration or hardware acceleration in the settings menu and enable them.
hile using Microsoft’s latest operating system offering Windows 10, you might have observed that playing movies using Microsoft’s default Movies & TV app allows your PC to run for a longer time. The default player also might prove beneficial if you are playing some high-resolution videos.
So, what’s the reason behind this? This difference in performance and battery life could be easily explained with the help of hardware acceleration or GPU acceleration. The pre-installed media players of your operating system often use hardware acceleration by default.
What is Hardware Acceleration? Why is it useful?
While playing a video, media players make use of two techniques. Software decoding, the first technique, decodes the video and reads the information using your PC’s CPU.
On the other hand, hardware acceleration allows the CPU to transfer the decoding job to PC’s GPU. With this option enabled, your PC is able to decode a video faster, using lesser battery. Overall, you get a smoother performance, better battery life, and more entertainment.
Is Hardware Acceleration available for all video codecs?
Well, if you refer to VLC’s GPU Decoding page, you’ll find the not all video codecs are hardware accelerated. I’ll be telling you further about supported hardware accelerated video codecs one by one when I’ll be discussing how to enable hardware acceleration in VLC on Windows, Linux, and OS X.
In general, try to use the H.264 video codec. It’s very popular these days and comes with .mp4 extension.
How To Enable Hardware Acceleration In VLC?
Enabling hardware acceleration is highly recommended if you love to watch movies and TV shows on your laptop or old desktop. Just in case this thing doesn’t turn out fine and you experience a buggy performance, you can revert back to original configuration any time. So, let’s get help you get up and running!
Enabling hardware acceleration in VLC | Windows PC
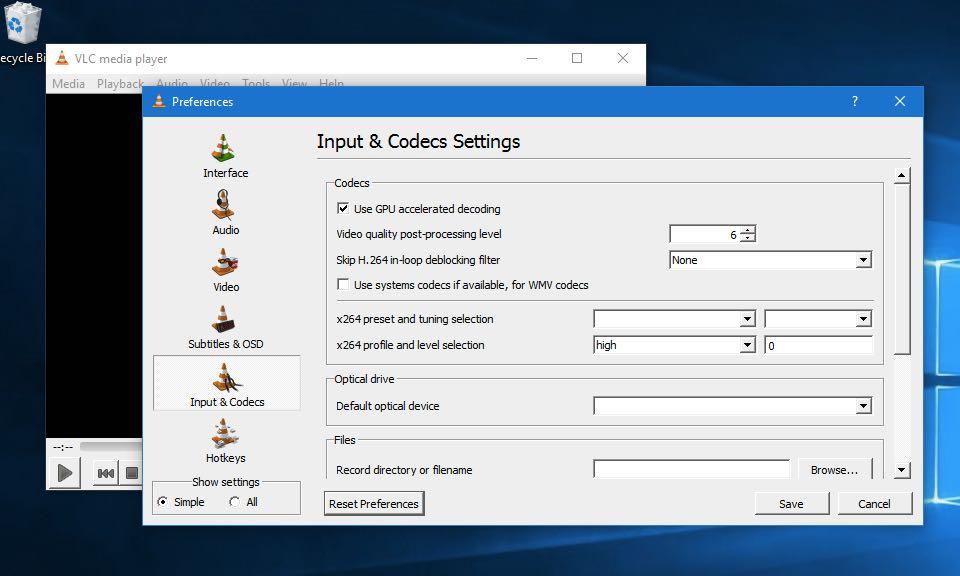
To enable the hardware acceleration option in your Windows PC, open VLC media player and find the Preferences option in Tools.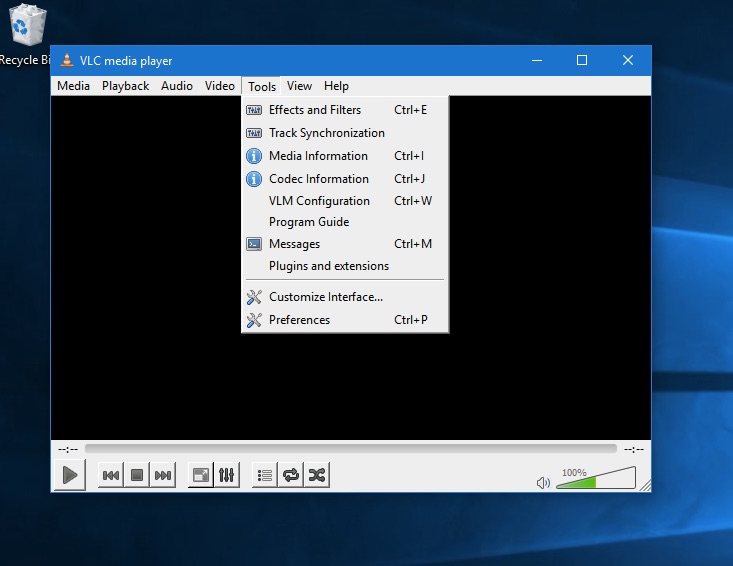

Here, you’ll need to click on the Input/Codecs tab and look for optionsHardware-accelerated decoding or GPU accelerated decoding–it might differ depending upon your VLC version.
Supported video codecs in Windows:
MPEG-1, MPEG-2, WMV3, VC-1 and H.264 (MPEG-4 AVC) are supported.
Enabling hardware acceleration in VLC | Mac OS X
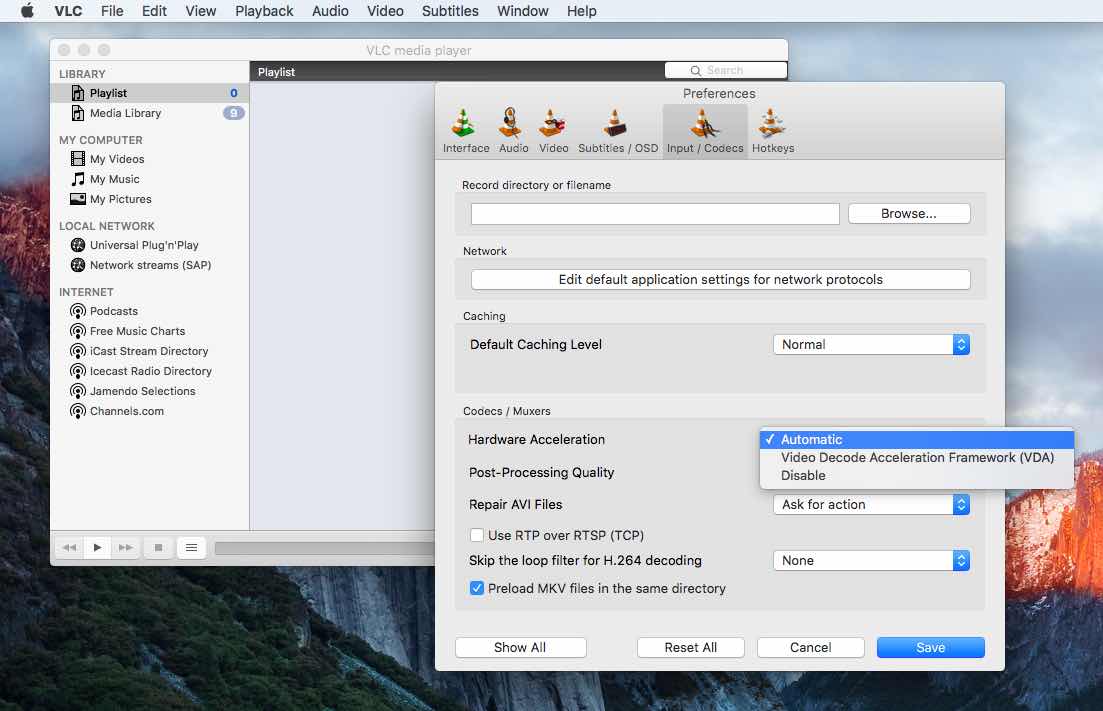
To enable the GPU acceleration option on your Mac, open VLC media player and find the Preferences option in VLC menu.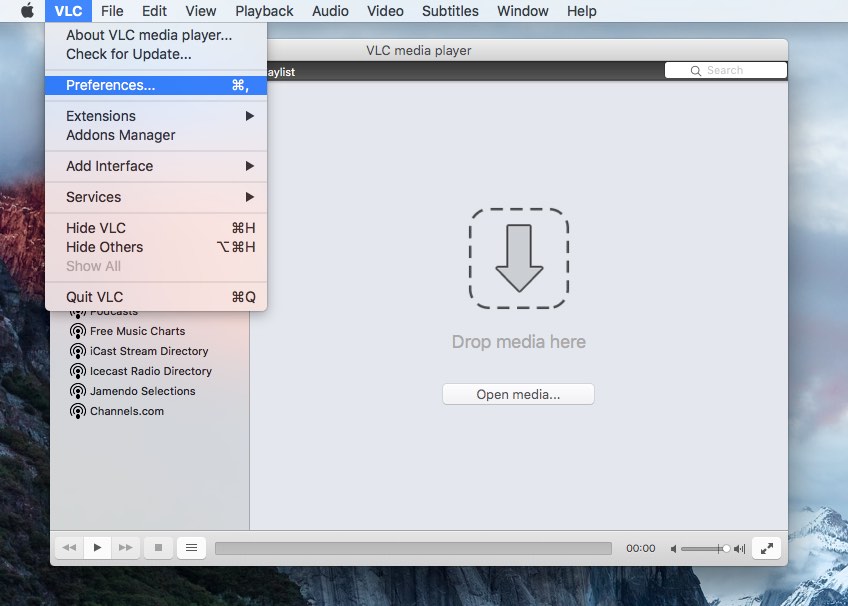

Here, you’ll need to find the Input/Codecs tab and look for the option Hardware-acceleration.
Supported video codecs in Mac OS X:
Only H.264 (MPEG-4 AVC) is supported.
Enabling hardware acceleration in VLC | GNU/Linux
For enabling the hardware acceleration option in VLC, on my Ubuntu desktop, I opened VLC media player and located the Preferences option in VLC menu.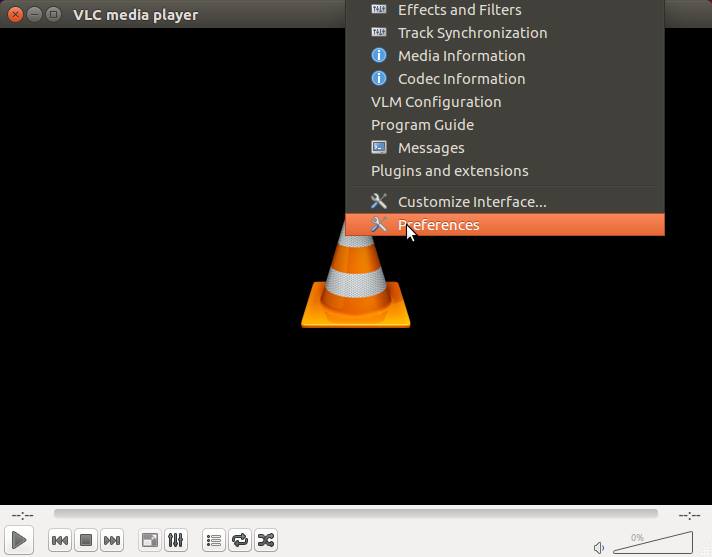

There, I found the Input/Codecs tab and looked for the option Hardware-accelerated decoding. Now, one just needs to select the Automatic option and the job is done.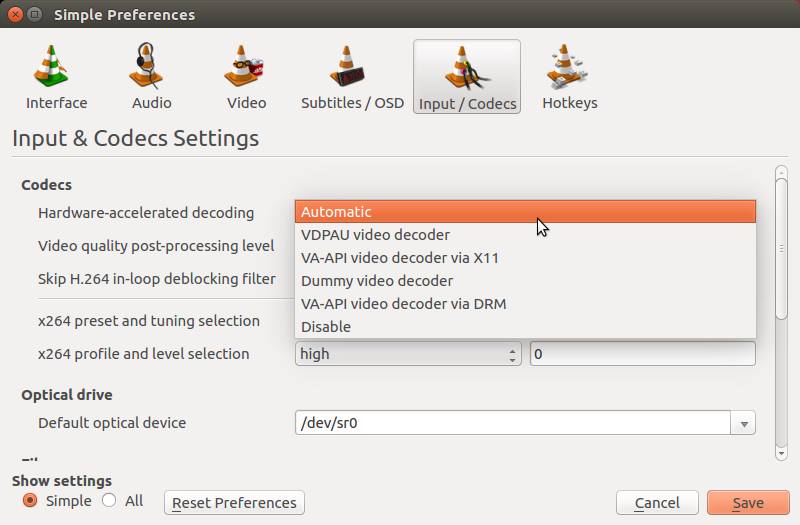

Supported video codecs in GNU/Linux:
MPEG-1, MPEG-2, MPEG-4 Visual, WMV3, VC-1 and H.264 (MPEG-4 AVC) are supported.
Note:
As told earlier, hardware acceleration allows your PC’s CPU to transfer the video decoding job your PC’s GPU. So, if you are already using a powerful desktop PC or using a brand-new and fast laptop whose power adapter is connected, the hardware acceleration won’t help you.
Did you find this tutorial on hardware acceleration in VLC useful? Share your views in the comments below.

No comments:
Post a Comment